
Cooking activities are a wonderful way for students with disabilities to practice communication, motor skills, following directions, and teamwork—all while having fun! This series of Halloween-themed recipes is designed with classroom participation in mind, offering simple, step-by-step tasks that learners of all ability levels can enjoy. Each recipe encourages engagement, builds independence, and adds a festive touch to your fall lessons—because every student deserves the chance to take part in the seasonal fun!
This post may contain affiliate links. As an Amazon associate, I may receive a commission on qualifying purchases, at no extra cost to you. Some images were created using ChatGPT to illustrate some concepts visually.
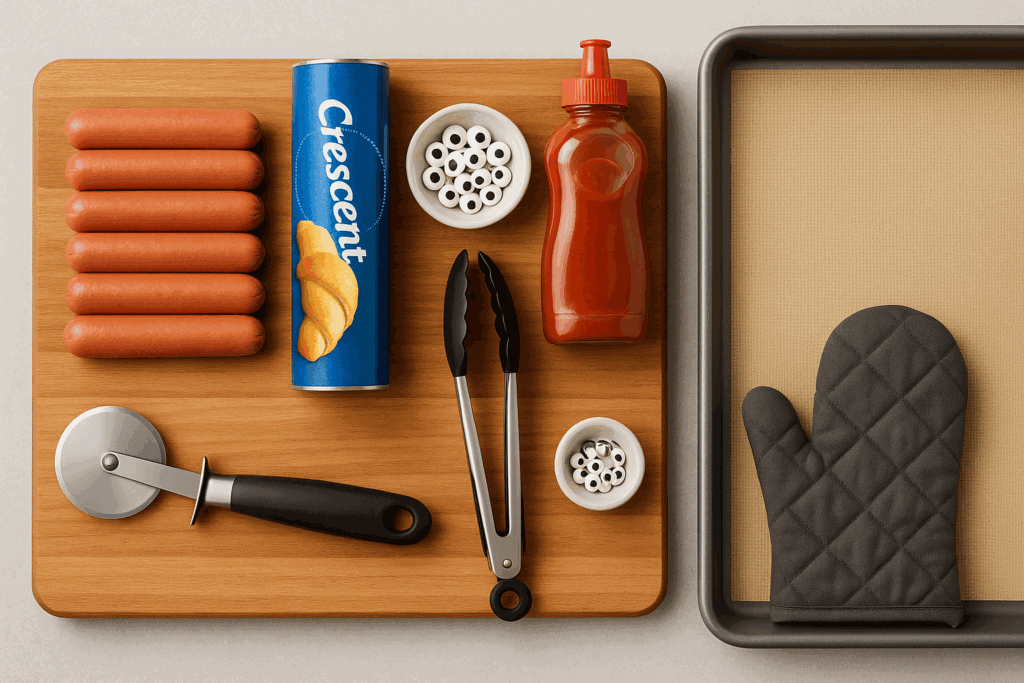
🧟♀️🌭Mummies in a Blanket
Ingredients/Supplies
- 🌭Pack of hot dogs
- 🥐1 package Crescent Roll Dough
- 👀 Edible candy eyes
- 🍯 Mustard or 🍅 Ketchup
- 🔪 Cutting board
- 🍕 Pizza cutter
- 🔧 Tongs
- 🔥 Oven or toaster oven
- 🧁 Baking sheet & foil or non-stick liner
- 🛒 Check out my list of adapted cooking supplies on Amazon here.
Directions
- 🔥 Preheat oven to 375°F
- 📦 Open crescent roll package
- 🍕 Unroll the dough
- 🔪 Cut dough into thin strips
- 🌭 Wrap dough around hot dog
- 🧁 Place on baking sheet
- ⏱️ Bake for 10–12 minutes
- 👀 Add eyes
- ❄️ Let cool and serve!
- ✏️ Follow up your cooking lesson with recipe comprehension
🔥 Preheat Oven
Preheat the oven or toaster oven to 375°F. If your classroom doesn’t have full-sized appliances, a large countertop toaster oven works perfectly — it’s compact, easy to use, and still cooks everything just right!
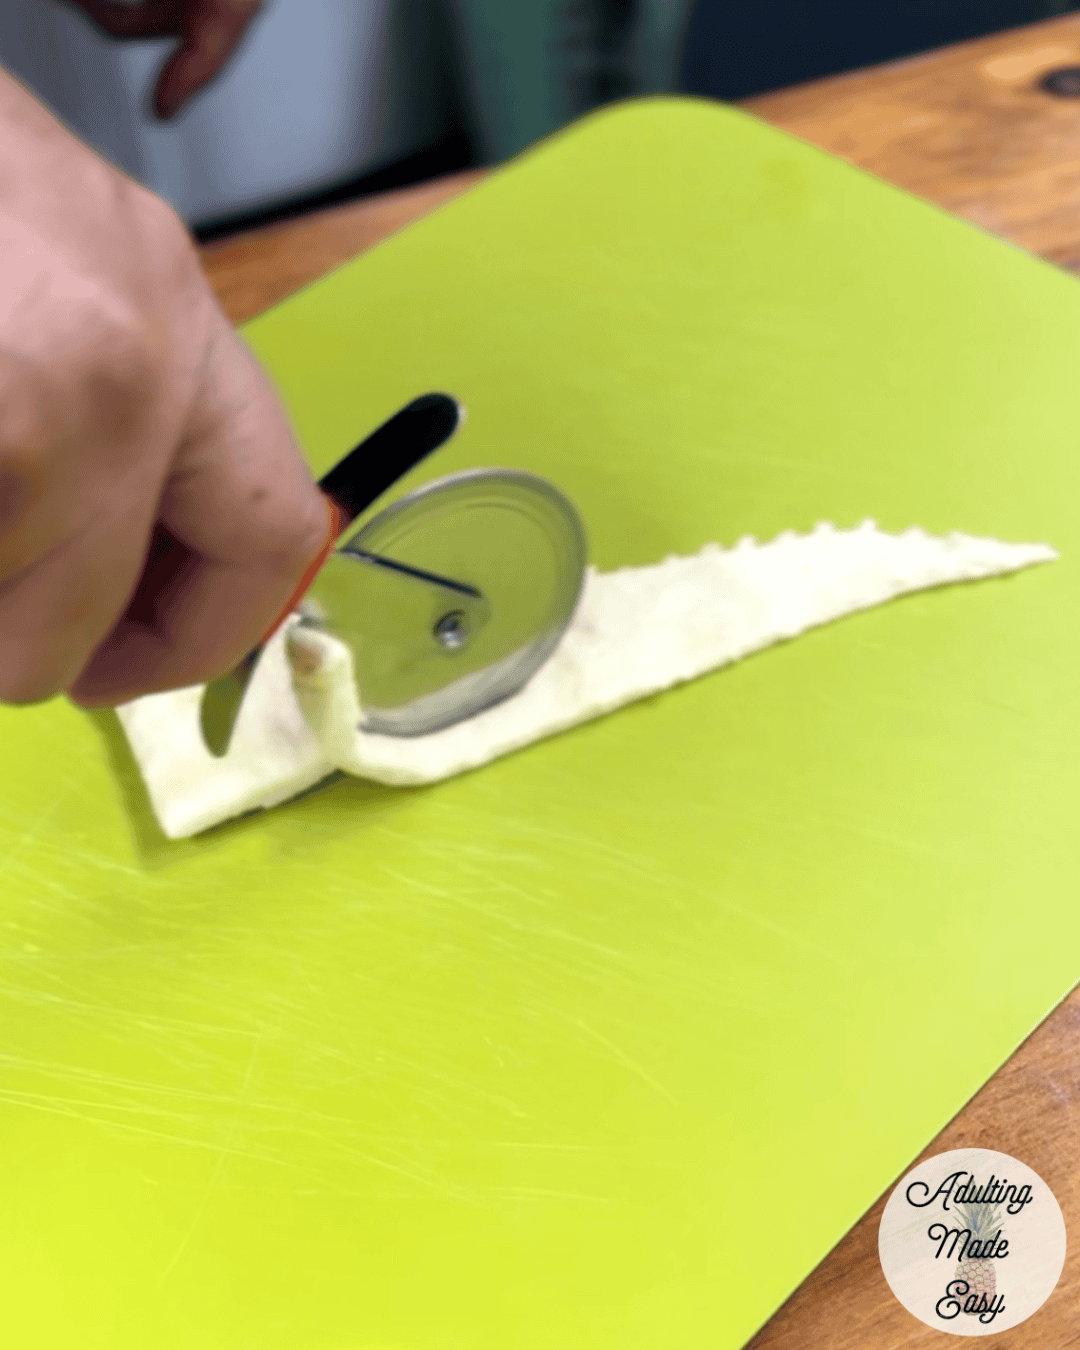
🍕 Crescent Roll Dough
While the oven is preheating, open the crescent roll package and place the dough on a cutting board. Use a pizza cutter to cut along the perforated lines for shorter strips, or press the seams together to make longer strips before cutting.
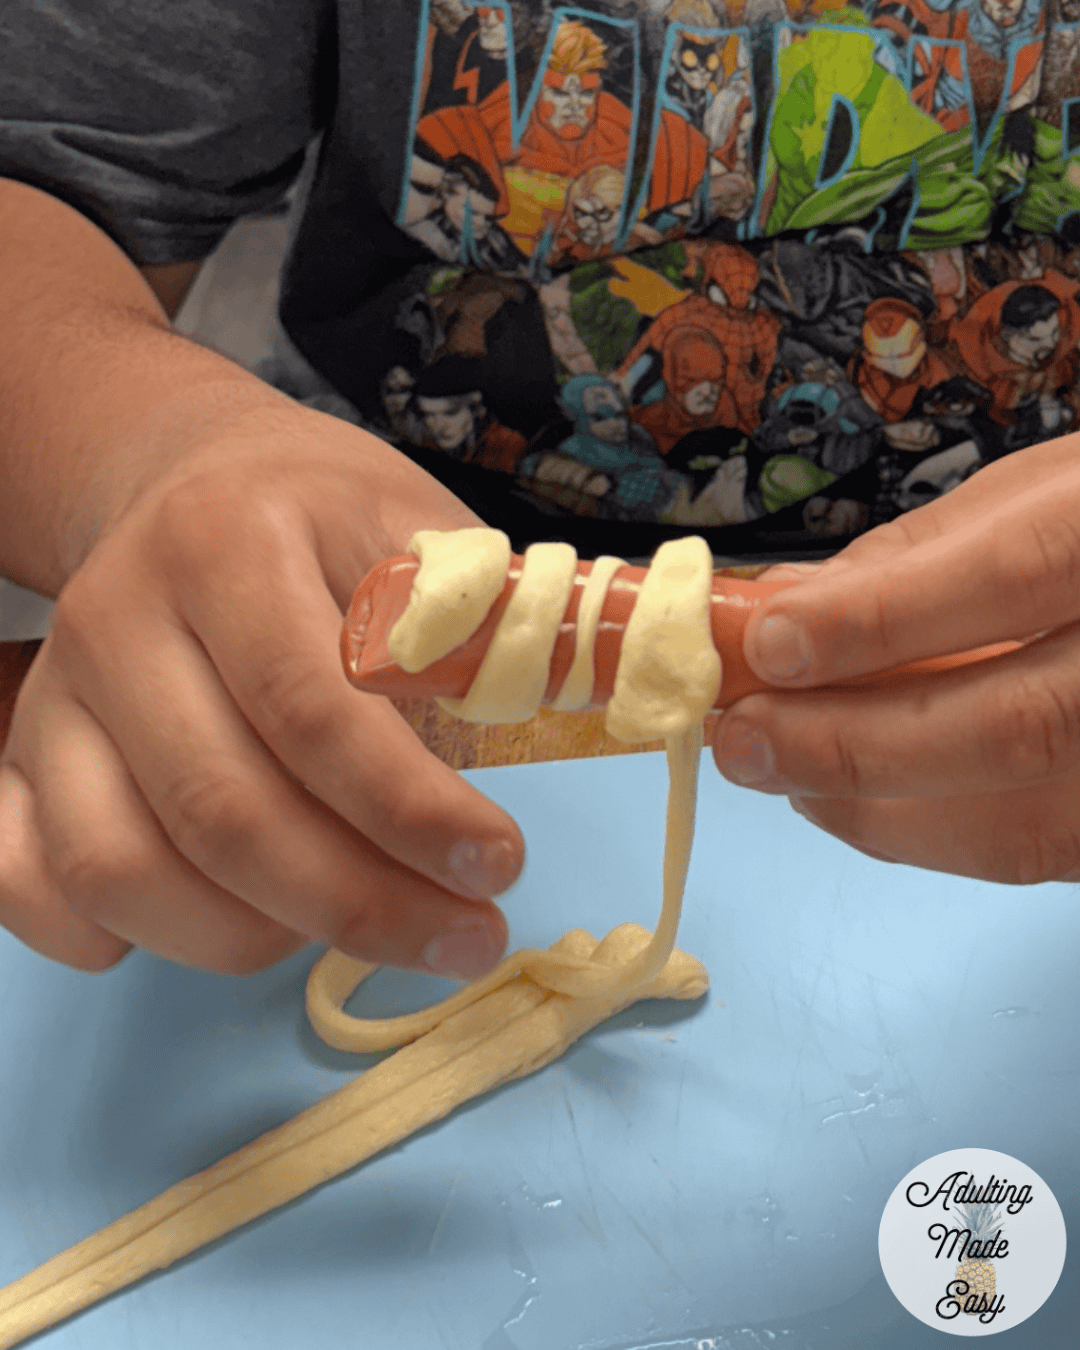
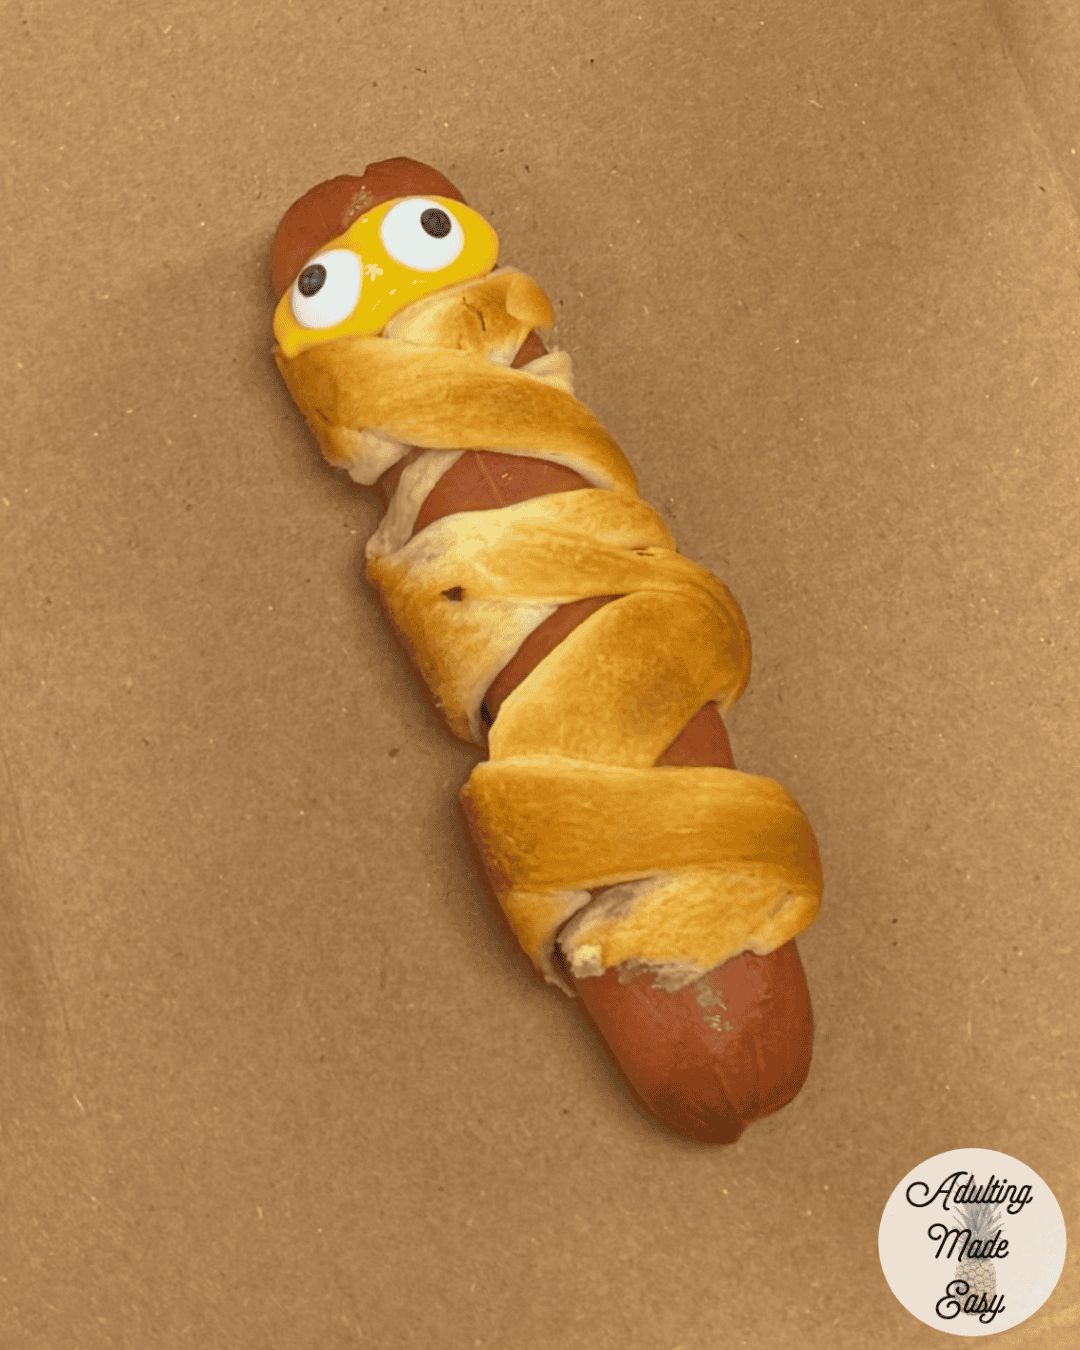
🌭 Creating the mummy bandages
Wrap the dough strips around the hot dog. Let the strips overlap or crisscross to look like mummy bandages. Leave a small space at the top for the eyes.
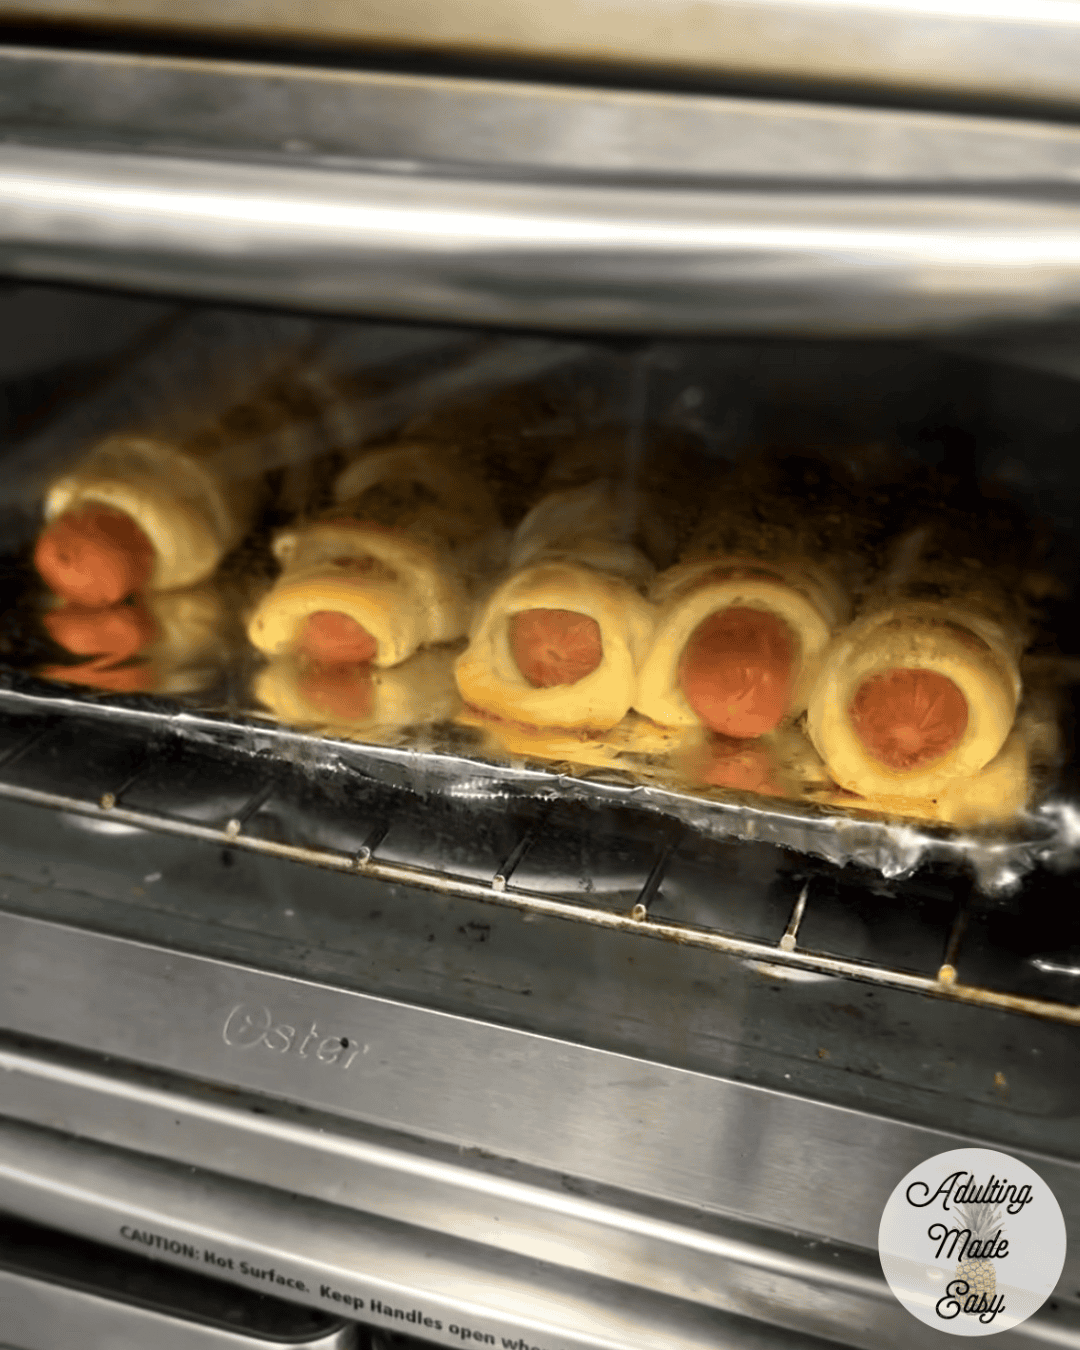
⏱️ Bake for 10–12 minutes
Place wrapped hot dogs on a baking sheet and bake for 10-12 minutes or until the dough is golden brown. Ovens/toaster ovens have timers on them, but this visual timer is a great tool to help them see how much time is left.
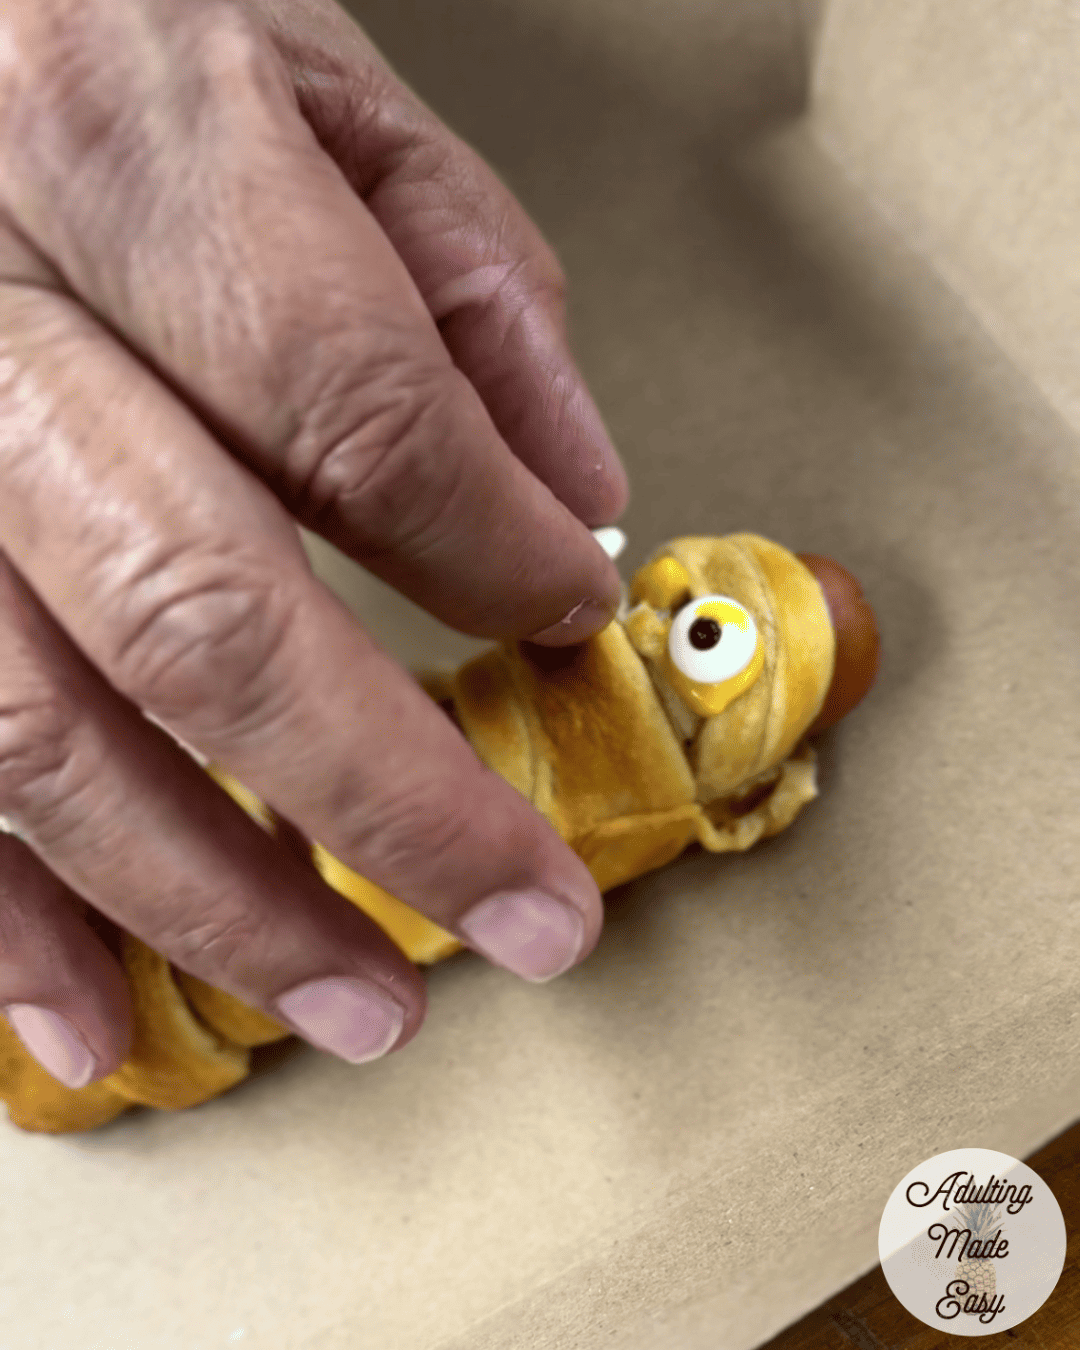
👀 Add eyes
Remove from the oven using tongs and place a dot of ketchup or mustard in the gap. Then place the candy eyes on the ketchup/mustard. If you don’t have candy eyes, you can create creepy-looking eyes with just ketchup and mustard.

🍽️ Let cool & eat!
Let it cool for a minute before serving. If your students have a hard time waiting, this visual timer is a great tool to help them see how much time is left.
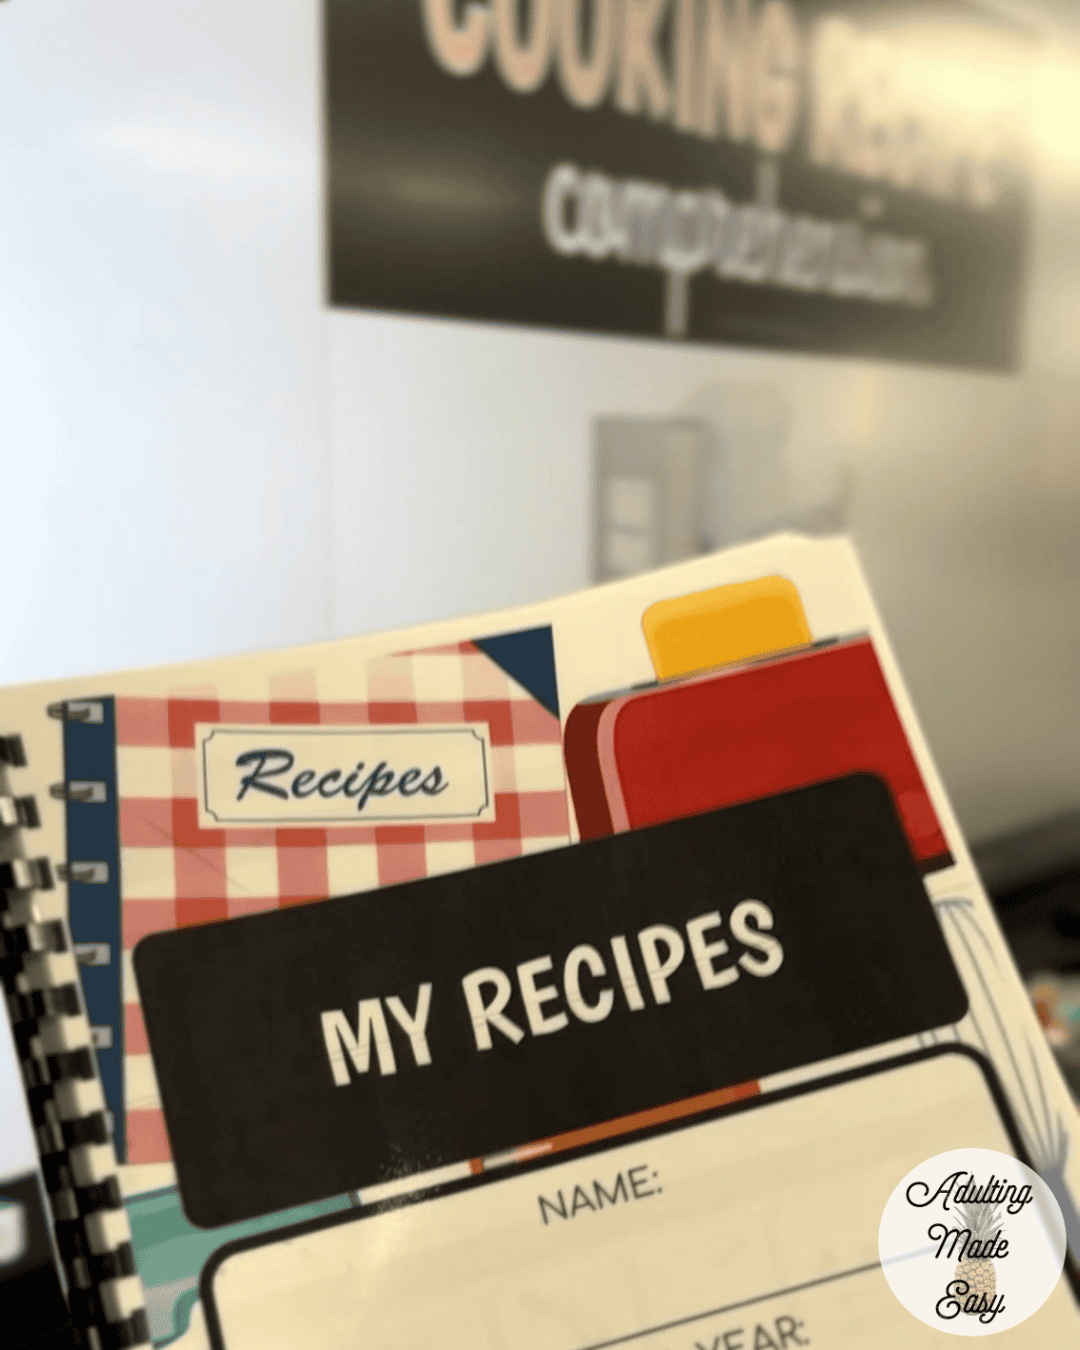
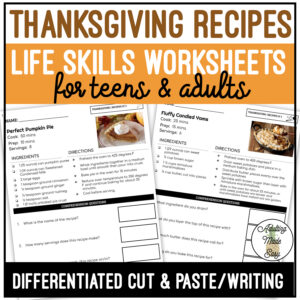
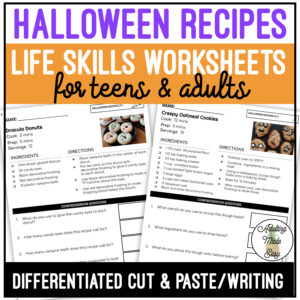
✏️Recipe Comprehension
Extend the cooking lesson with a comprehension activity to check for understanding and build additional skills such as reading a recipe, vocabulary, and sequencing. This resource includes differentiated, visual worksheets and a digital slides version that can be used for whole-group instruction or as visual support for students completing their worksheets.

Cooking activities like this are a fun and engaging way to bring seasonal excitement into your classroom while supporting important life skills. From following directions to making choices and practicing fine motor skills, every step offers a meaningful learning opportunity. Whether your students are building independence or simply enjoying the sensory experience, this recipe is sure to be a classroom favorite. Happy Halloween, and happy cooking! 🎃
You might enjoy these activities:


FionaspedadultingEdit Profile